Forums
- Forums
- Axis And Allies Forum
- Skinning Tips / Tutorials
- My way for making rivets
My way for making rivets
Post a reply
- Go to Previous topic
- Go to Next topic
- Go to Welcome
- Go to Introduce Yourself
- Go to General Discussion
- Go to Screenshots, Images and Videos
- Go to Off topic
- Go to Works in Progress
- Go to Skinning Tips / Tutorials
- Go to Skin Requests
- Go to IJAAF Library
- Go to Luftwaffe Library
- Go to RAF Library
- Go to USAAF / USN Library
- Go to Misc Library
- Go to The Ops Room
- Go to Made in Germany
- Go to Campaigns and Missions
- Go to Works in Progress
- Go to Juri's Air-Raid Shelter
- Go to Campaigns and Missions
- Go to Works in Progress
- Go to Skinpacks
- Go to External Projects Discussion
- Go to Books & Resources
-
Hi guys,
i just found a way to make rivets more realistic in my old eyes and want to share my new way with you.
Most of us do it with white and black dots - i did the same for a couple of years - but i was playing with bevel and emboss since 2 years.
Ok let's start.
You guys know, i make my templates in 4096 all the time, so the brush-size is here 4 pixel.
For this small tutorial i created 2 layers - "rivet tut finish" and "rivet tut bevel".
Step 1
Go to the layer-settings and select bevel and emboss.
Select the Relief-option and pull the slider for the size to zero.
The angle is here very important - i try to set it to the cockpit anytime.
It is a lot of work, i know that, but imo the result is awesome.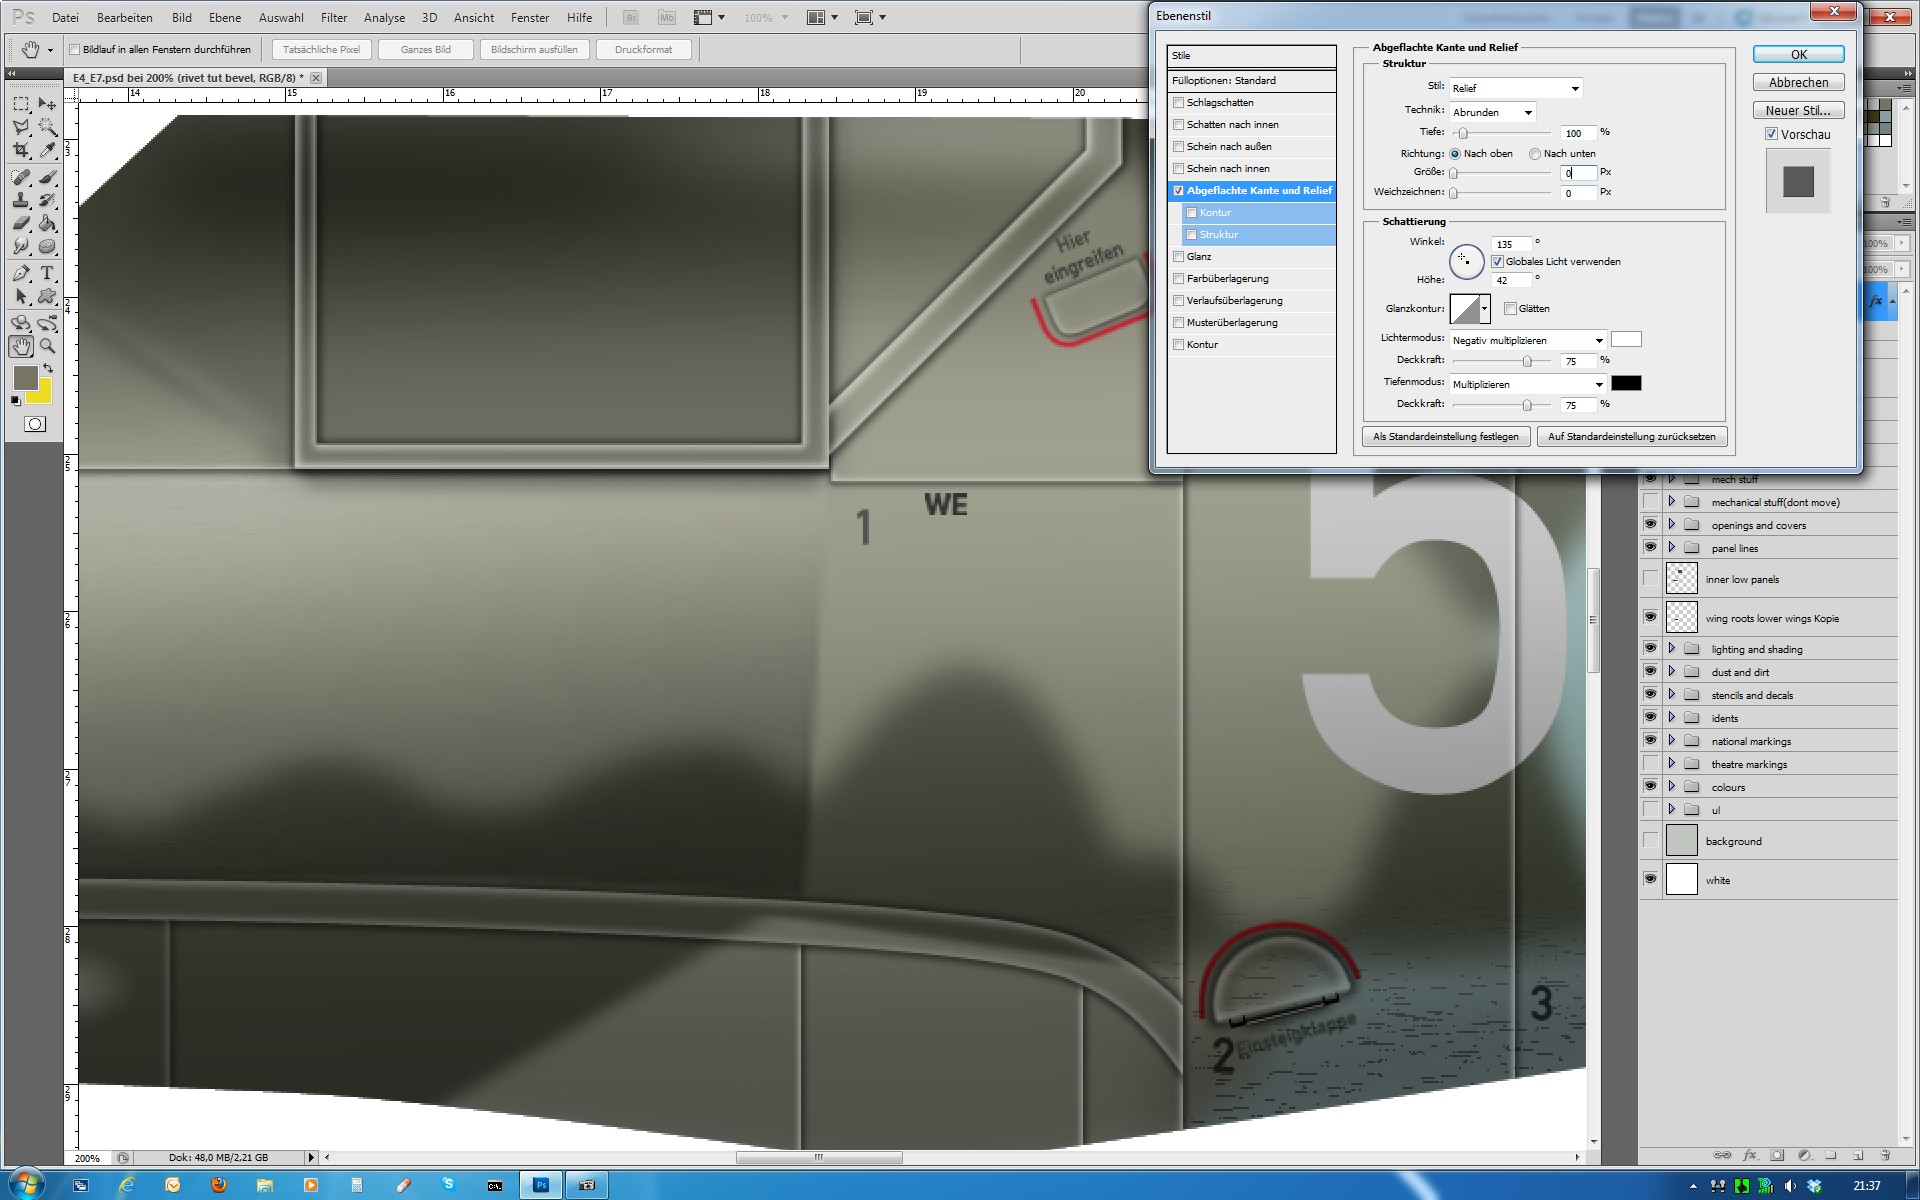
Step 2
Select the space between the dots and make here your brush-size.
Here in my example it is 4pix and a space of 450. The colour is also important - don't use white or black, try a bright grey or like in
my example RLM 02.
Step 3
Draw your rivets now.
At this point a small advice - draw your rivets in two layers, one for the horizontal and one for the verticals.
So you can better remove the rivets, which are too much or on top of each other.
Step 4
The rivets stick up too much, so we have to copy the "rivet tut bevel"-layer and disable the effects at the layer-settings.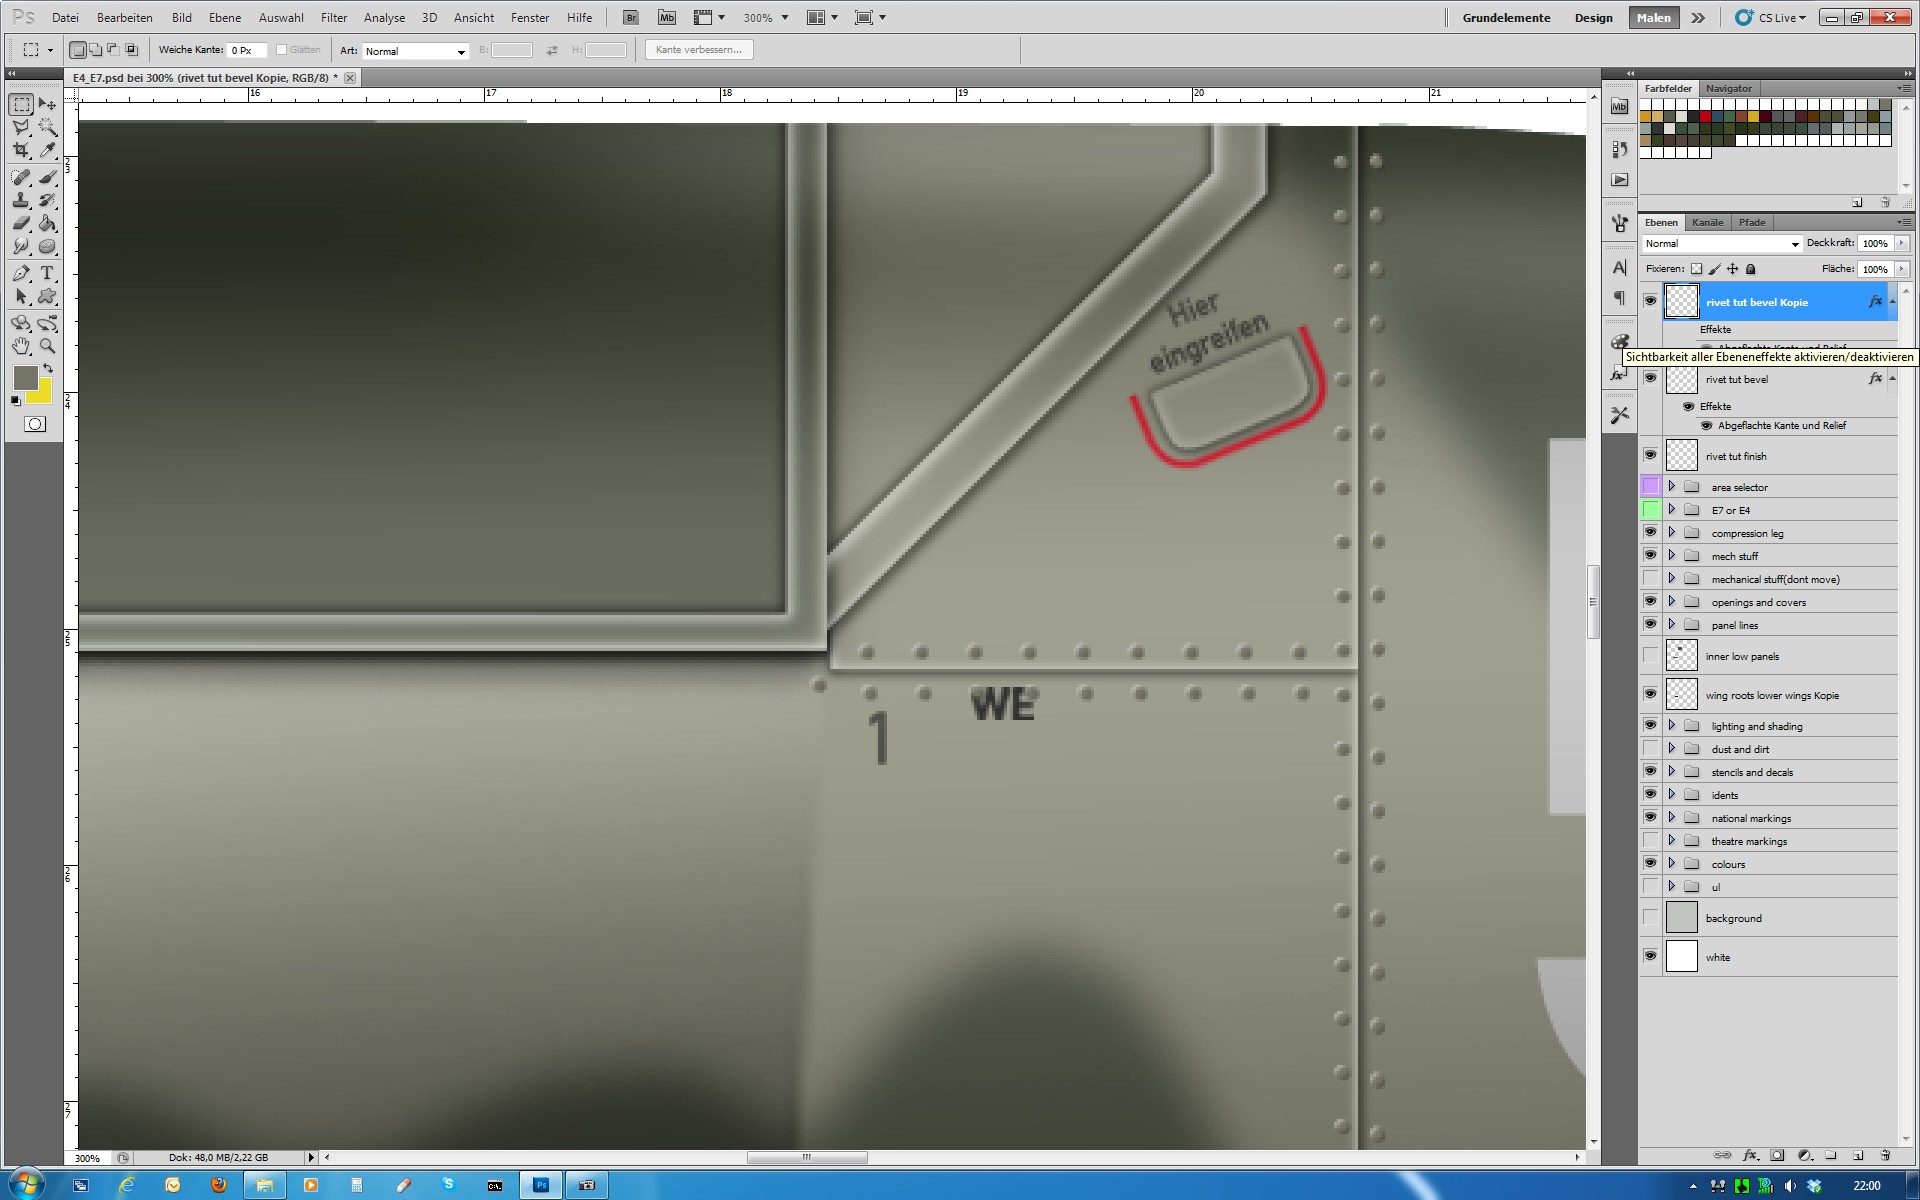
Step 5
Now we put the original "rivet tut bevel"-layer together with the "rivet tut finish"-layer.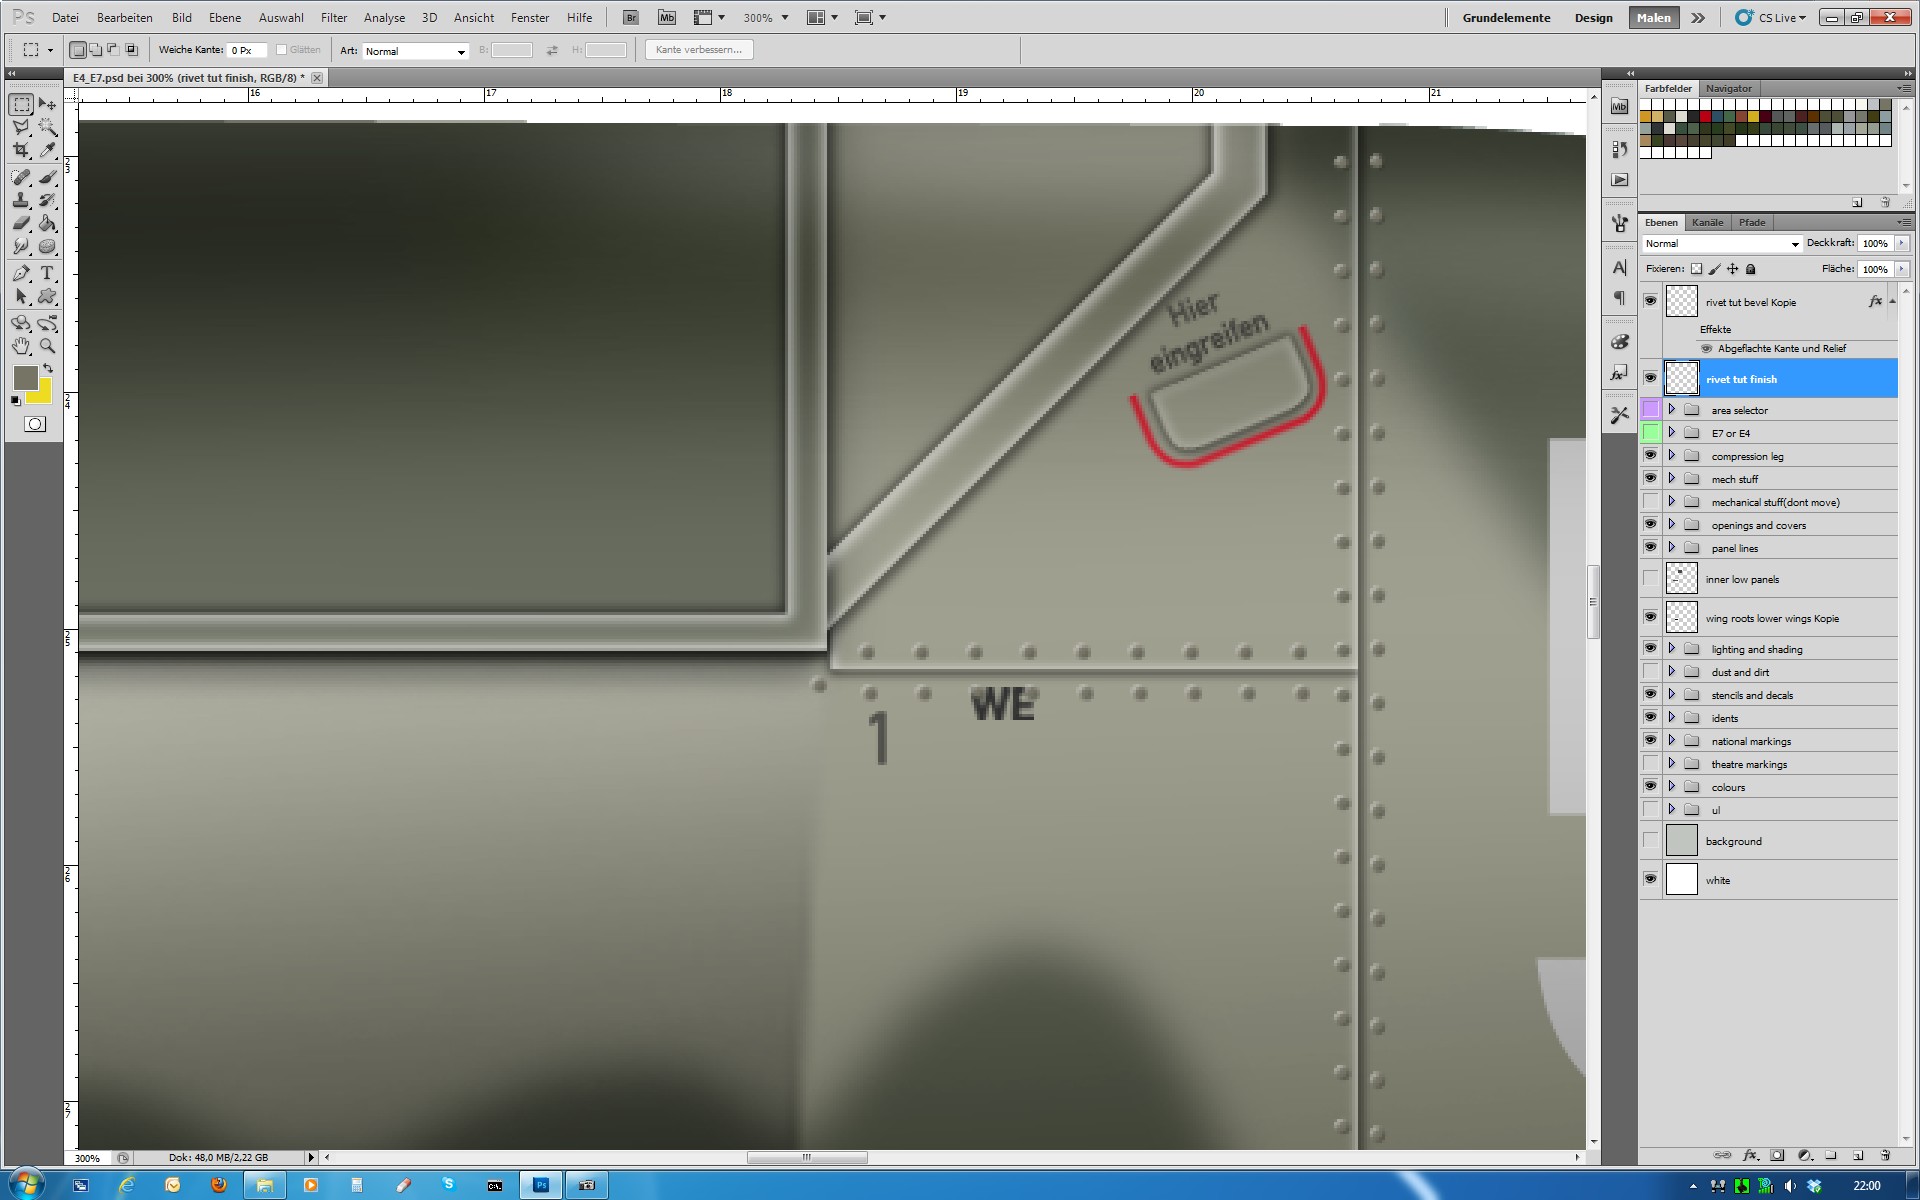
Step 6
Now put the copy together with the "rivet tut finish"-layer. REMEMBER, the effects have to be disabled!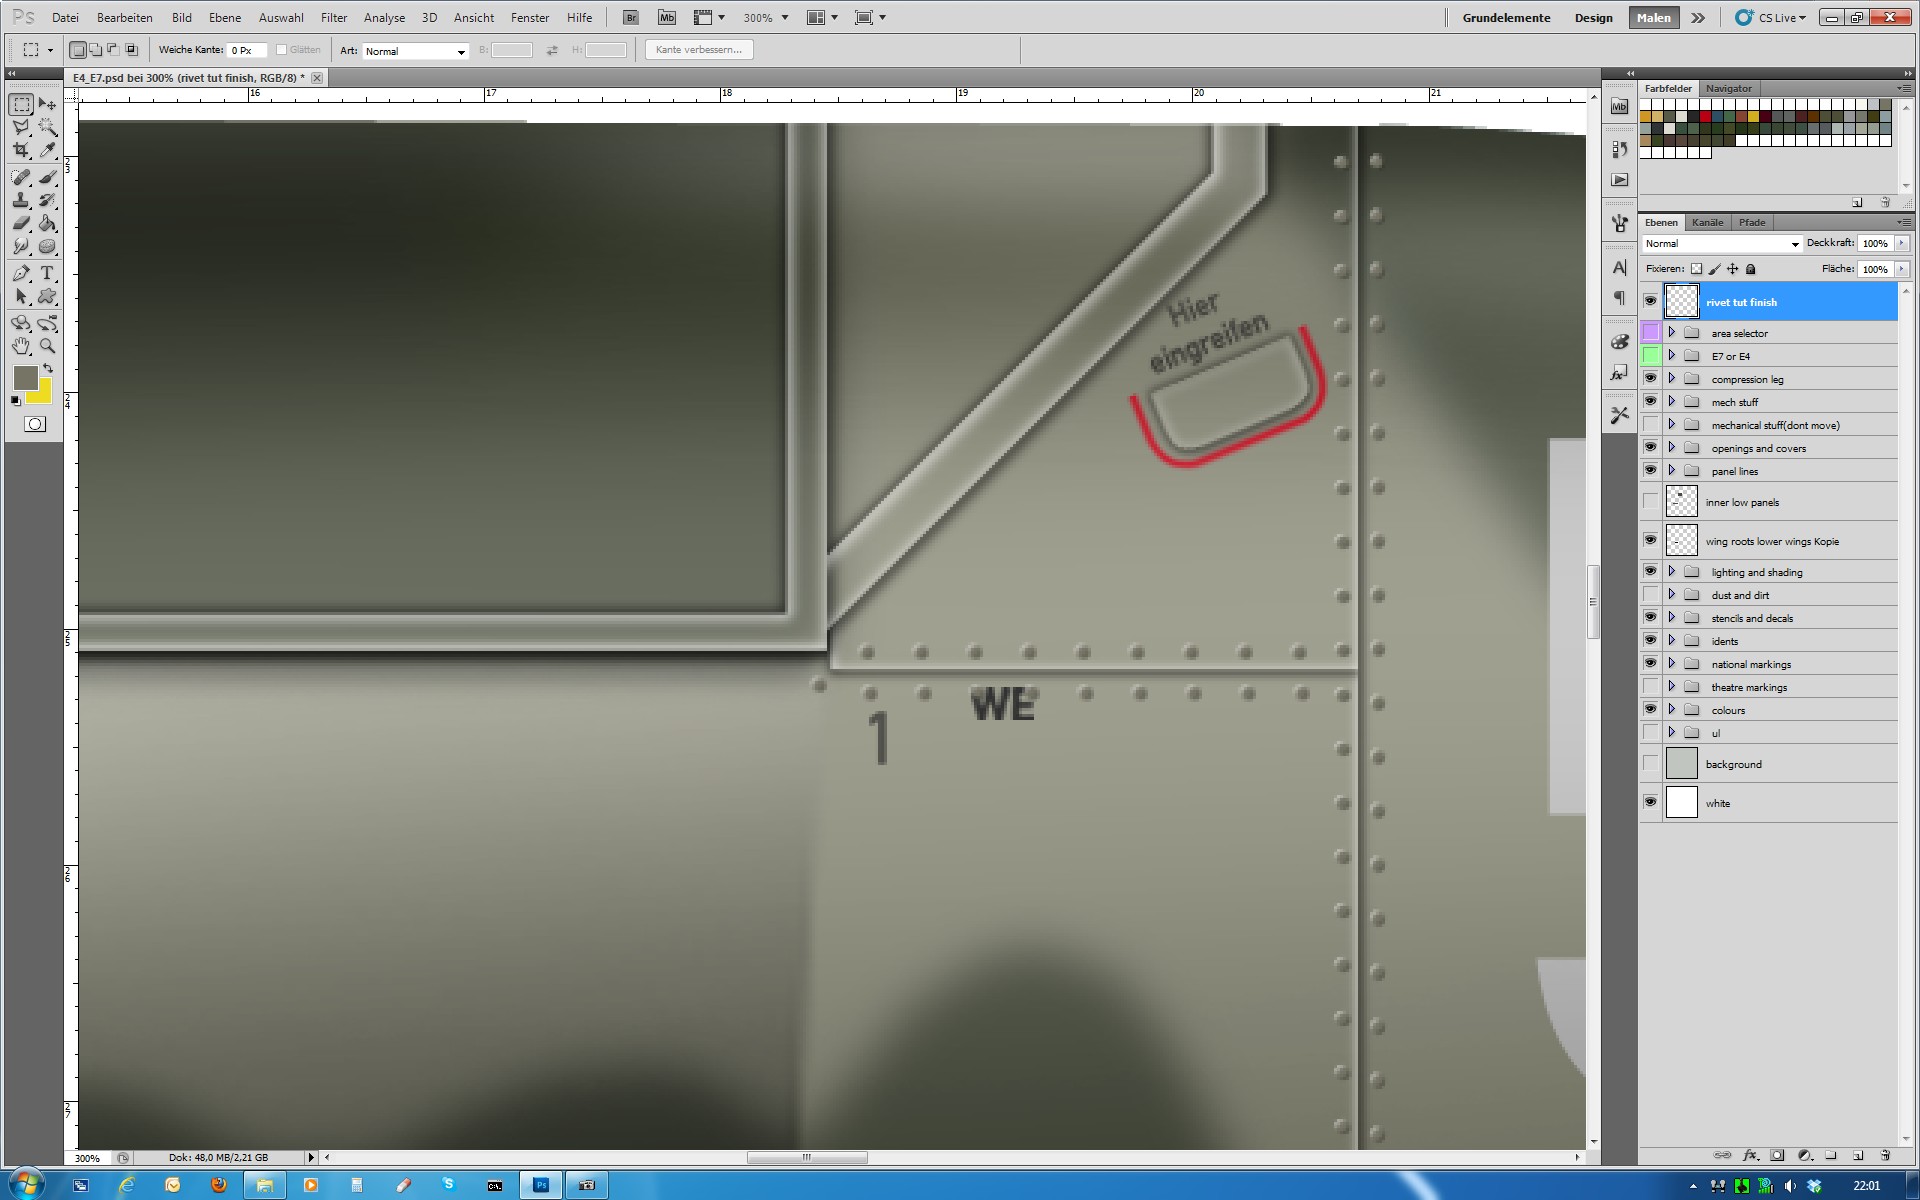
Step 7
We go now to the layer-settings, there is a field which is called "Normal". Open the scroll down menu and set the settings to
"Copy into each other"
Now you can see the result - it doesn't matter what colour is below the rivets,
with this technique they will look painted in the correct colour.
Step 8
For making the rivets really nice, we copy the layer, here it is "rivet tut finish shaddows"
and put it below the "rivet tut finish"-layer.
Step 9
Now press "CTRL+U" and move the slider for the brightness full to the left.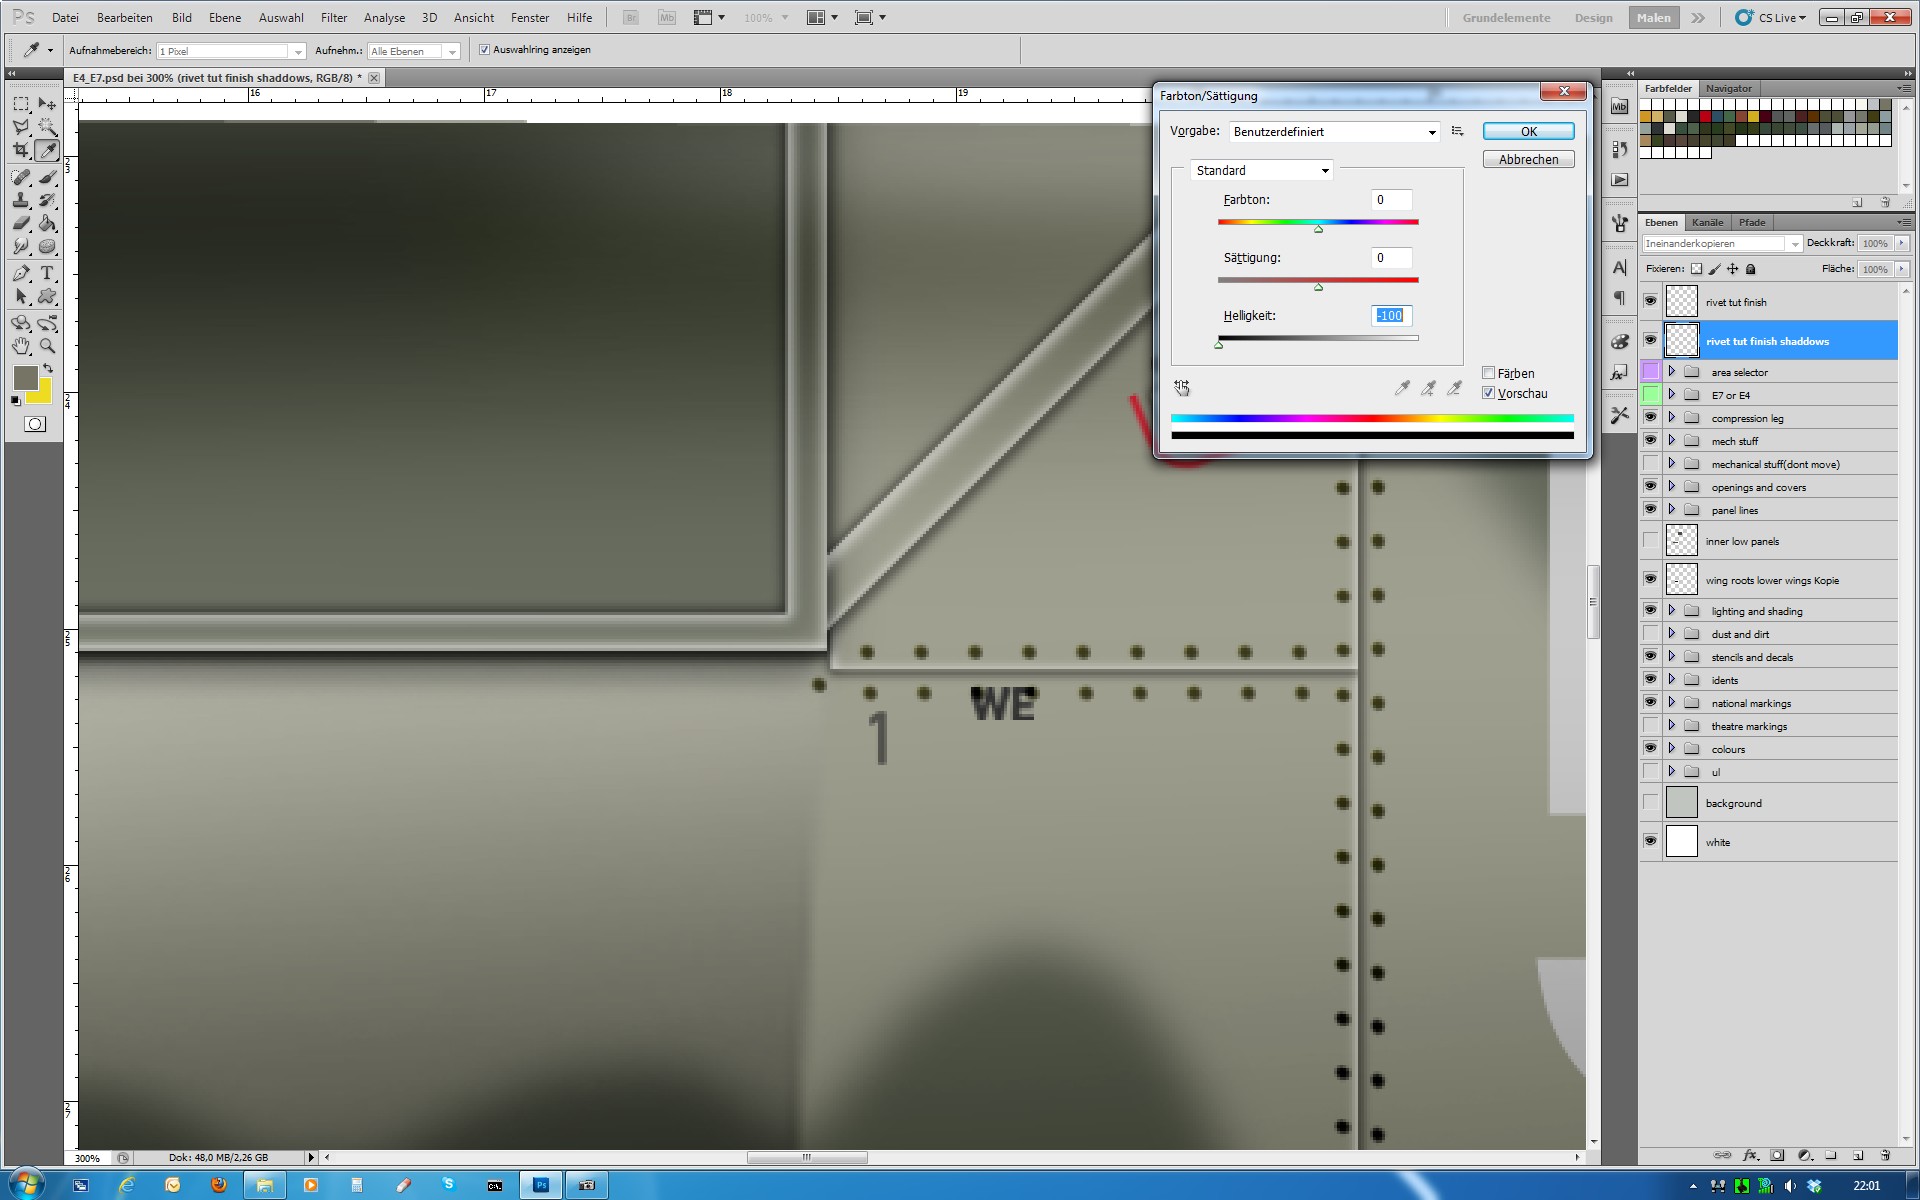
Step 10
Select the Gausian blure and set it to 2 pixel.
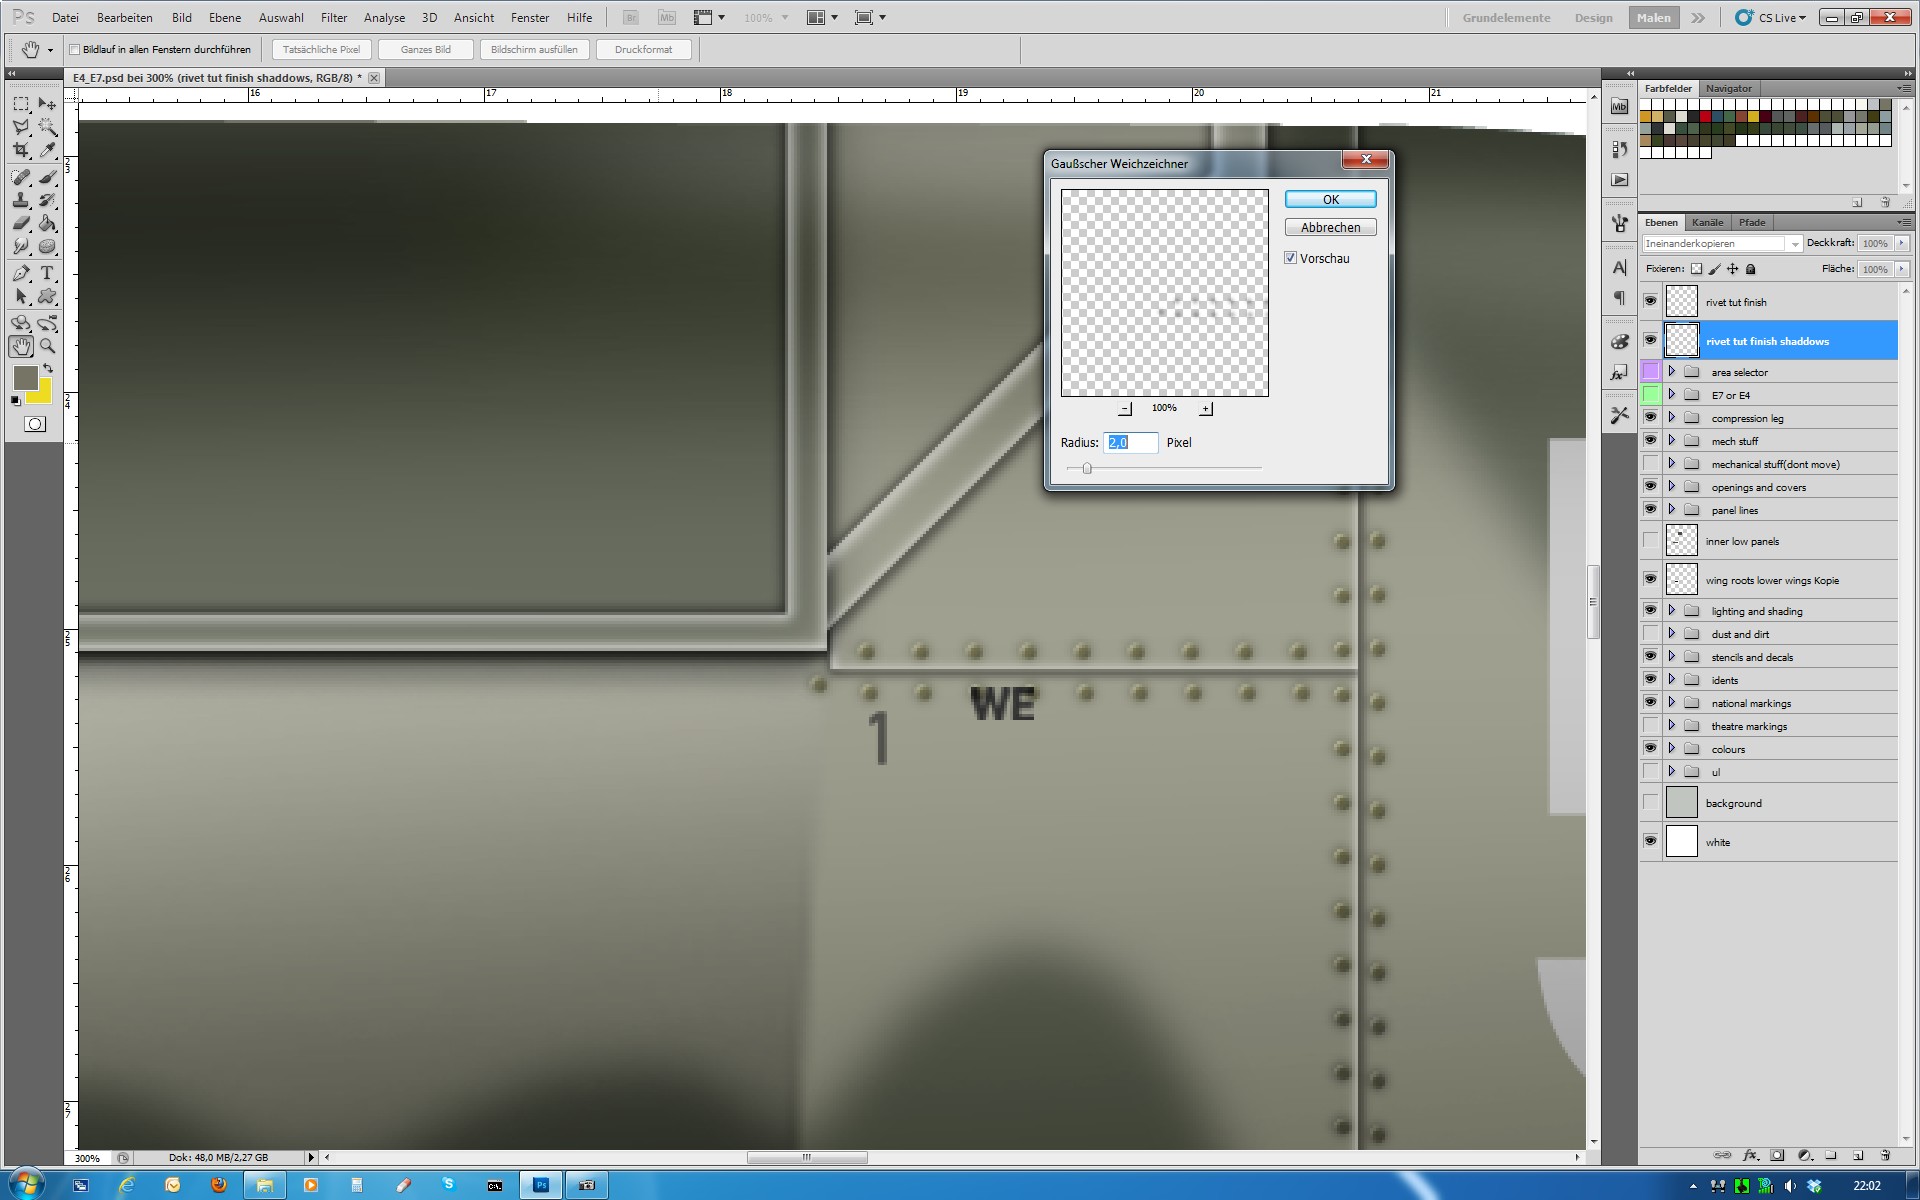
Step 11
Make now a seletion on the "rivet tut finish"-layer, but make sure you are in the shaddows-layer.
HOLD THE CTRL-KEY AND KLICK ON THE MINIATURE LAYER!!!
Step 12
Press "DELETE" now.
Play with the opacity of the shaddows-layer until you are happy.
Here is the final result: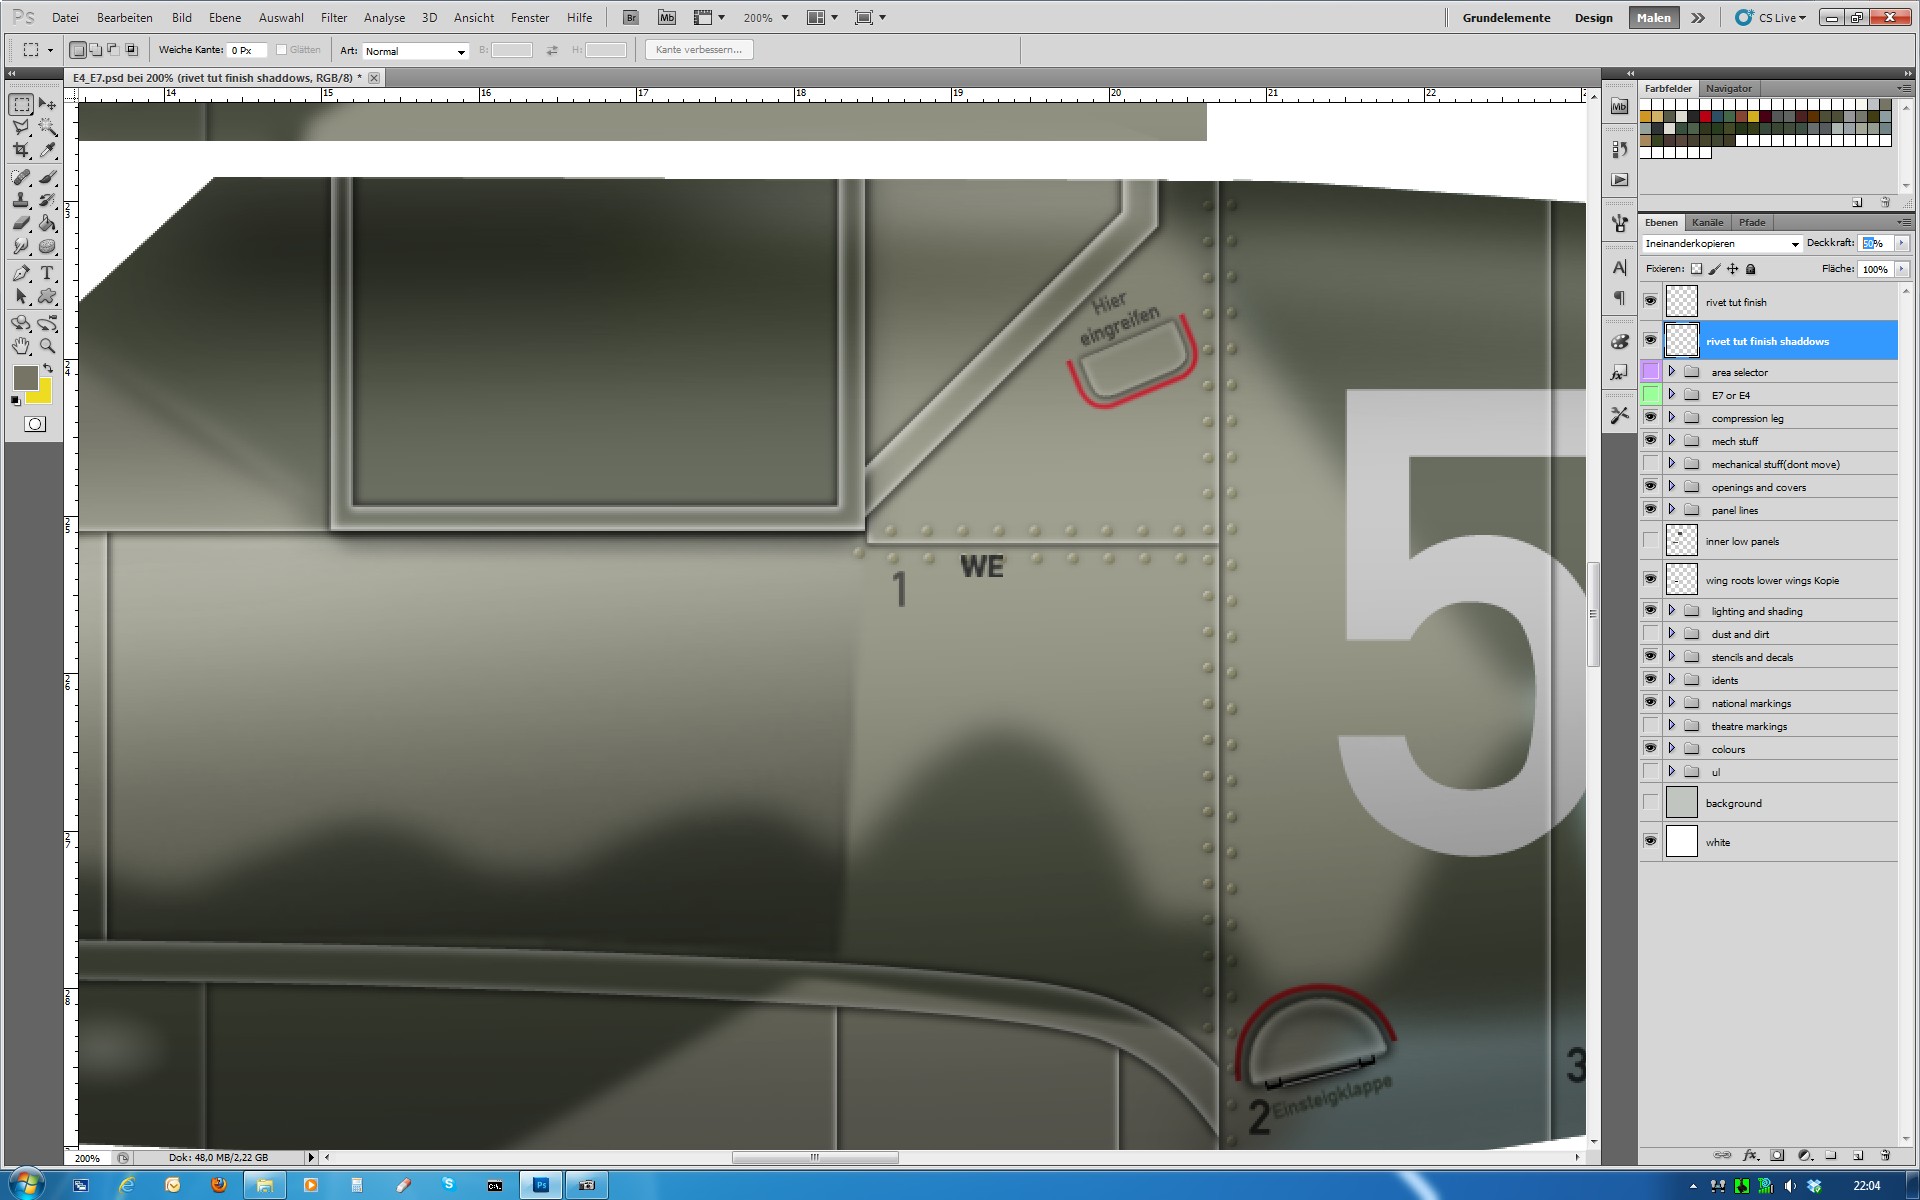
I hope you can use it, if not, don't let me know.
-
 Main Adminthx Mario for posting this tutorial, very usefull
 -
Glad you like it Detlef.
I know it is a lot of work, but if you have some practice, it is done pretty quick.
Post a reply
- Go to Previous topic
- Go to Next topic
- Go to Welcome
- Go to Introduce Yourself
- Go to General Discussion
- Go to Screenshots, Images and Videos
- Go to Off topic
- Go to Works in Progress
- Go to Skinning Tips / Tutorials
- Go to Skin Requests
- Go to IJAAF Library
- Go to Luftwaffe Library
- Go to RAF Library
- Go to USAAF / USN Library
- Go to Misc Library
- Go to The Ops Room
- Go to Made in Germany
- Go to Campaigns and Missions
- Go to Works in Progress
- Go to Juri's Air-Raid Shelter
- Go to Campaigns and Missions
- Go to Works in Progress
- Go to Skinpacks
- Go to External Projects Discussion
- Go to Books & Resources
