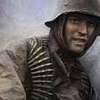
Me109G-10 'White 11 + -' "Rosemarie"
-
Hello!
I spent many months studying fotos of 'Rosemarie' to make as historically correct depiction
as I can. Still a WIP, but I hope you like!
Me109G-10 'White 11 + -' "Rosemarie"
Features:
~ Corrected Overall Colours to RLM 74/75/76. Typical WNF built Eagle.
~ Cowl Paint (still a WIP)
~ Corrected Gruppe II Markings
~ Corrected German National Markings
~ Deleted Luft 4 Markings, I see no evidence of the 50cm Luft 4 band or JG 53 Pik-As symbol
~ Corrected 'Rosemarie' Script ( more refined & weathered)
~ Overall very weathered/battle damaged look
~ Much more to do!
This was a pretty banged up G-10, it tells the story of a hard life that started out in II./JG 51, and ended with II./JG 52. Its various dents/scratches/grease/grime/burns tell the tale of a probable ground attack use with JG 52, or it very well have destroyed some VVS aircraft at close range... an unknown at this point.
~Flown by Ogefr. Gerhard Richter - born 1924
~Bomber Trained, 3/EJGr(J)
~Do 17, Do 217, Bf 109 "Black 2", Bf 109G-10 "White 11"
~Fighter Operational Clasp
~A "New Growth" pilot, he was licensed as a fighter pilot on 23 March, 1945. He flew "Black 2" on his 1st mission on 7 April, 1945, which he forced landed at Halberstadt, due to an oxygen/blackout problem. AC pictured at Neubiberg, May 1945. The name "Rosemarie" appeared under the cockpit. Thought to be Richter's AC.
~ * though some suggestions are that Helmut Lipfert flew 'Rosemarie'.
Getting closer to completion... still WIP! This depicts as delivered at Neubiberg, May 1945.
Can't get the lighting quite right..


How do I fix this (light coloured strip arrow is pointing too [both sides])?
Any tips/suggestions more then welcomed! Thanks! =) -
Hello Ice~Eagle,
First, let me say I've never skinned a 109, so please take that into account when I offer my advice.
It appears to me that the light texture on the wing root is not due to the in-sim lighting, which is sometimes the case; but that it's actually a piece from somewhere in your template that has not been accounted for yet. In fact it may be a shared texture, but lets hope not.. otherwise you'll have to chose the lesser of two evils when deciding which color to paint it. But first, you've got to find it.
The best place to start, is to apply Adlabs Panelfinder. This is a great tool for doing initial assessments on a 3D model, and to identify the location of major components.
To fine-tune even further, there's Nightshifter's Panelfinder Extension.
And if you really want to 'get down in the weeds', you can make your own, similar to the one I made in the screenshot. It contains a layer filled with equidistant cross-hatched multi-colored lines, and an additional layer with multi-colored numbers. I've been using this technique for years now, and it's been a real time-saver in the paintshop. It's enabled me to overcome the fear of even the toughest cammo schemes and template mappings.. it's the M-60 machine gun of my skinning toolbox I did a tutorial on this a few years ago at some other IL2 website I can't recall at the moment, but I've never put it up for grabs because I think at this level, it's something best done by the individual skinner to suit their own tastes and style. What works well for my eyes and brain, may not be so good for the next.
Of course if you try to build one of these, you don't have to fill the entire 1024x1024 layer with unique lines and numbers. I simply selected about 1/16 of the area, and starting at the upper left corner of the template, built the initial line and numbers sets; then simply copy-pasted each set, until I filled it's respective layer. If any questions arise on the 3D model due to duplicate lines or numbers, I can always turn-on Adlabs Panelfinder to settle the dispute. All in all, it's a pretty good system.
btw; I may have noticed an additional texture glitch. It's hard to tell on this one, due to the historical nature of the mix-n-match components.. but check the area on the upper cowling between the guns (1st skin-shot). See how the cammo blotch is chopped off? I don't know if this is a seam on the 3D model that requires spanning, or if it's intentional to represent a historically replaced panel (?).
Anyway, I think it's great that you are dedicating so much time towards getting this right. I think we've all seen our share of "in by nine - out by five" skinning jobs, so it's refreshing to see a skinner who's particular about their work, and who is receptive to critique.
There are a few guys at our hangar that certainly know a lot more about 109's than I, so hopefully they can offer some insight as well; that is, if they spot something.
It's a nice looking skin you've got going here; keep up the great work. ~ Rudi -
Brilliant! Thanks so much! I did your method with the lines, worked perfectly!


The area of the cowl, I know looks bad.. but I fix a little. Got to get cranking on the rest now.. Again many thanks to you and A&A!
Another question if I may.. How does one go about making the black main wheel rims to red? Its would be consistsnt with this theme. -
Hello,
Ice~Eagle
Another question if I may.. How does one go about making the black main wheel rims to red? Its would be consistsnt with this theme.
I found the .tga file for the wheels, I painted the mains red, and made the whitewall tail wheel.
When I play, the tailwheel modification shows up no problem, but no main red wheels. I need a solution
to this problem, many thanks in advance..
-
Sorry, I don't have a solution for your undercarriage problem, but I wanted to say that this skin is shaping up nicely.
-
-
-
Hello all,
I followed Rudi_Jaeger excellent camo tutorial here: http://www.axis-and-allies-paintworks.com/e107_plugins/forum/forum_viewtopic.php?180 to make the soot around the MG151 look from this:
To this:
The problem I'm having is that I can still see the seam where the panels meet as the game puts the skin on the 3D model. Is this the byproduct of the colour black, the game, or did I miss something? Thanks. =) -
Hi Ice-eagle,
this is always a problem but the Bf109 3D model is one of those lesser
difficult to get rid. Guess how difficult this can get when adding a lot of different weathering layers. While it is sometimes not possible to avoid visibility
of seams (especially due to ingame lighting) completely you can only try to reduce this by adapting the lighting/3D layers or the brightness/saturation of colours
at the seams. I'm working on the stuka a the moment and it's 3D nose is a hard nut to crack in this matter. But regarding especially the Bf109s maybe RDDR and Boelcke are more competent. I recall there was a 'lighting fix' for the fuselage sides.
Even if you check Bf109 skinning 'masterpieces' made by i. e. shooter (FBS) you will notice such seams.
BTW if you ask me your rich defense band is present, compare the area with the bird in front. Both have the bands but the top part of it is oversprayed grey as it was common in 1944/1945.
ATB
Armin
-
Hello cheruskerarmin,
Thank you for the information! In regards to the Luft 4 band, do you mean something like this?:
Looking more closely at the original foto, under 'inverted' colours, I see something in this relative position that could be considered a Luft 4 band.